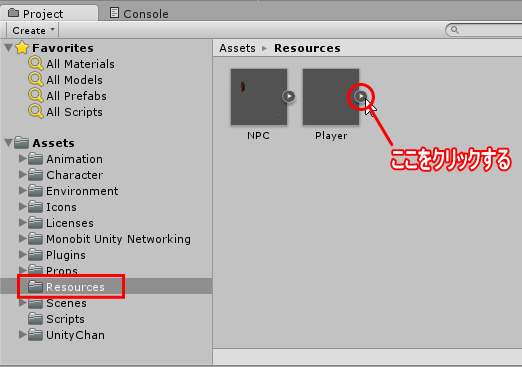
Assets/Resources フォルダを開き、 NPC.prefab の右端にある「>」のマークをクリックします。
すると、NPC.prefab の中身が展開されます。
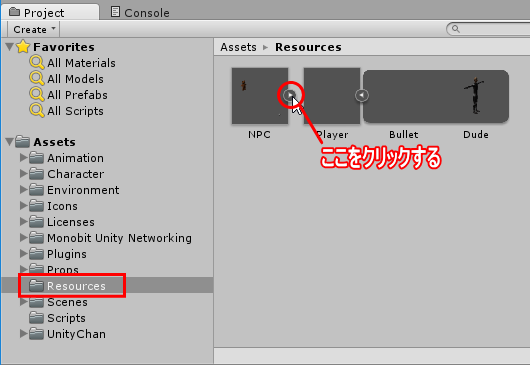
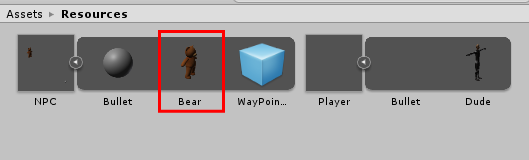
展開されたデータのうち、「Bear」と書かれたオブジェクトを選択します。
なお、当然のことながら、「クライアントに任せる=ある程度のタイムラグを許容した作りにする」必要があります。
その手法については、ゲームシステムの調整によって異なる話ですので、今回は割愛します。
Assets/Resources フォルダを開き、 NPC.prefab の右端にある「>」のマークをクリックします。
すると、NPC.prefab の中身が展開されます。
展開されたデータのうち、「Bear」と書かれたオブジェクトを選択します。
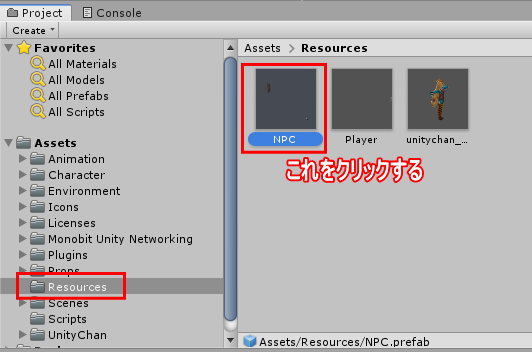
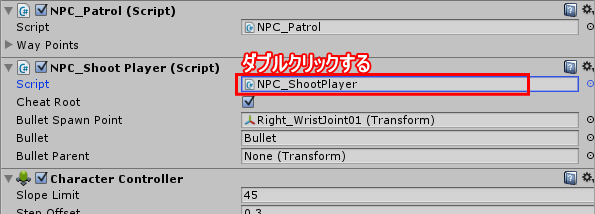
まず Assets/Resources フォルダーをクリックして選択し、その中にある NPC.prefab を選択します。
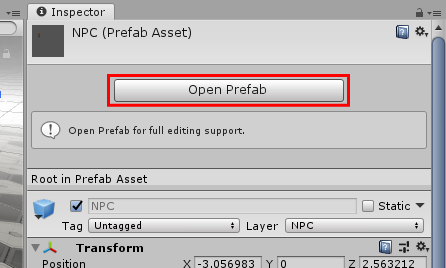
NPC の Inspector にある「Open Prefab」のボタンを押します。
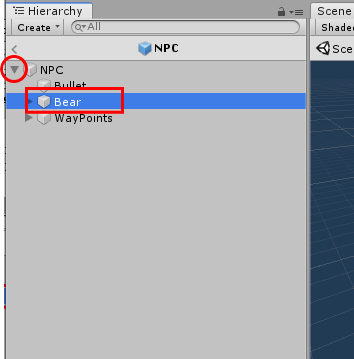
すると Hierarchy の表示箇所に NPC.prefab がリスト化されて表示されますので、
親オブジェクト「NPC」の左隣にある三角マークをクリックし、子オブジェクトの「Bear」を選択します。
では実際に変更を加えましょう。
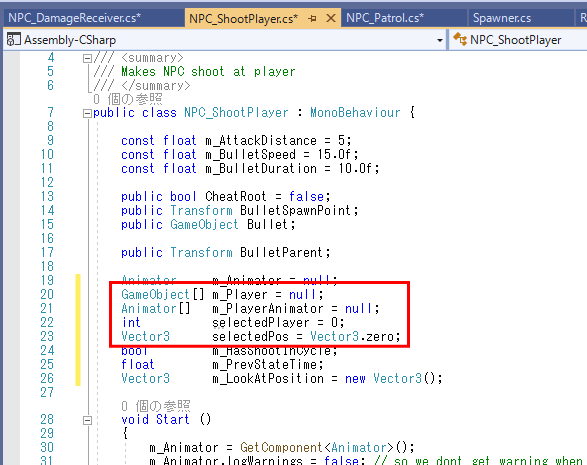
	GameObject[] 	m_Player = null;
	Animator[]	 	m_PlayerAnimator = null;
	int			selectedPlayer = 0;
	Vector3		selectedPos = Vector3.zero;
複数のプレイヤーに対応するために、プレイヤー参照変数を配列式にします。
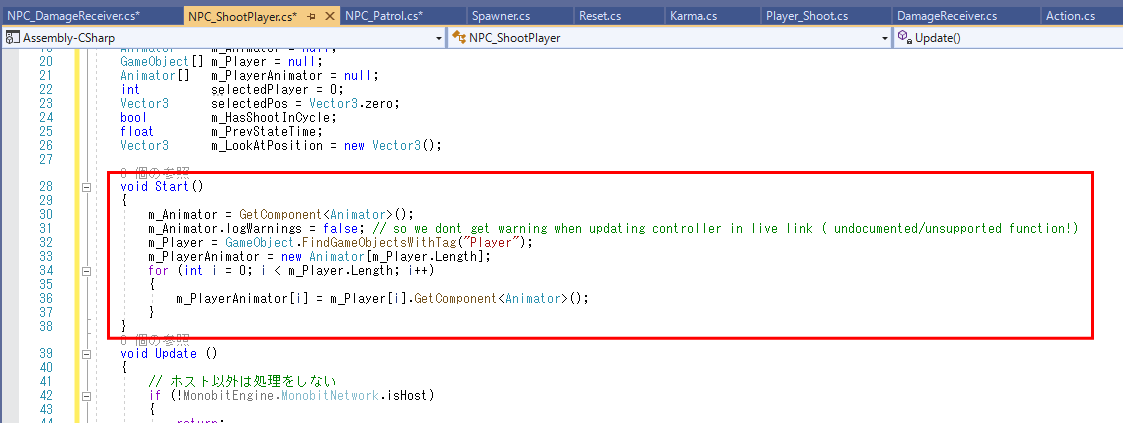
	void Start ()
	{
		m_Animator = GetComponent<Animator>();
		m_Animator.logWarnings = false; // so we dont get warning when updating controller in live link ( undocumented/unsupported function!)
		m_Player = GameObject.FindGameObjectsWithTag("Player");
		m_PlayerAnimator = new Animator[m_Player.Length];
		for( int i = 0; i < m_Player.Length; i++ )
		{
			m_PlayerAnimator[i] = m_Player[i].GetComponent<Animator>();
		}
	}
複数プレイヤーに対応できるように「Player」タグの追加キャラクタを複数取得し、そのAnimator情報を取得します。
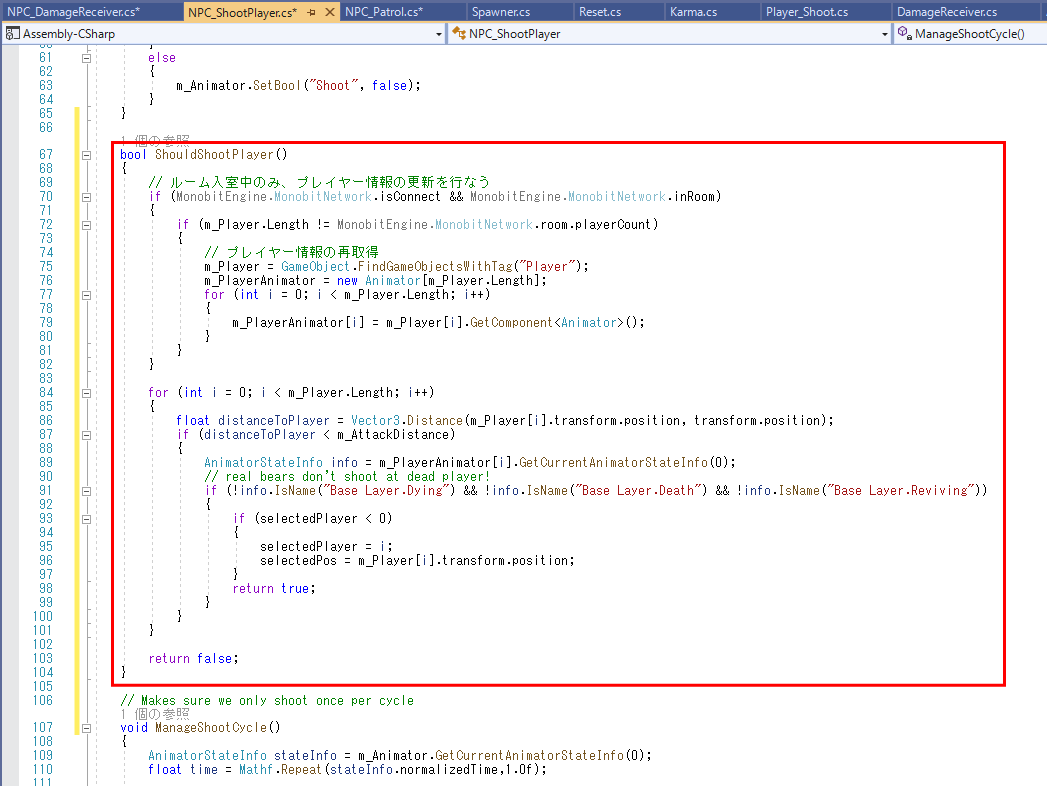
	bool ShouldShootPlayer()
	{
		// ルーム入室中のみ、プレイヤー情報の更新を行なう
		if(MonobitEngine.MonobitNetwork.isConnect && MonobitEngine.MonobitNetwork.inRoom)
		{
			if(m_Player.Length != MonobitEngine.MonobitNetwork.room.playerCount)
			{
				// プレイヤー情報の再取得
				m_Player = GameObject.FindGameObjectsWithTag("Player");
				m_PlayerAnimator = new Animator[m_Player.Length];
				for (int i = 0; i < m_Player.Length; i++)
				{
					m_PlayerAnimator[i] = m_Player[i].GetComponent<Animator>();
				}
			}
		}

		for (int i = 0; i < m_Player.Length; i++)
		{
			float distanceToPlayer = Vector3.Distance(m_Player[i].transform.position, transform.position);
			if (distanceToPlayer < m_AttackDistance)
			{
				AnimatorStateInfo info = m_PlayerAnimator[i].GetCurrentAnimatorStateInfo(0);
				// real bears don't shoot at dead player!
				if (!info.IsName("Base Layer.Dying") && !info.IsName("Base Layer.Death") && !info.IsName("Base Layer.Reviving"))
				{
					if(selectedPlayer < 0 )
					{
						selectedPlayer = i;
						selectedPos = m_Player[i].transform.position;
					}
					return true;
				}
			}
		}

		return false;
	}
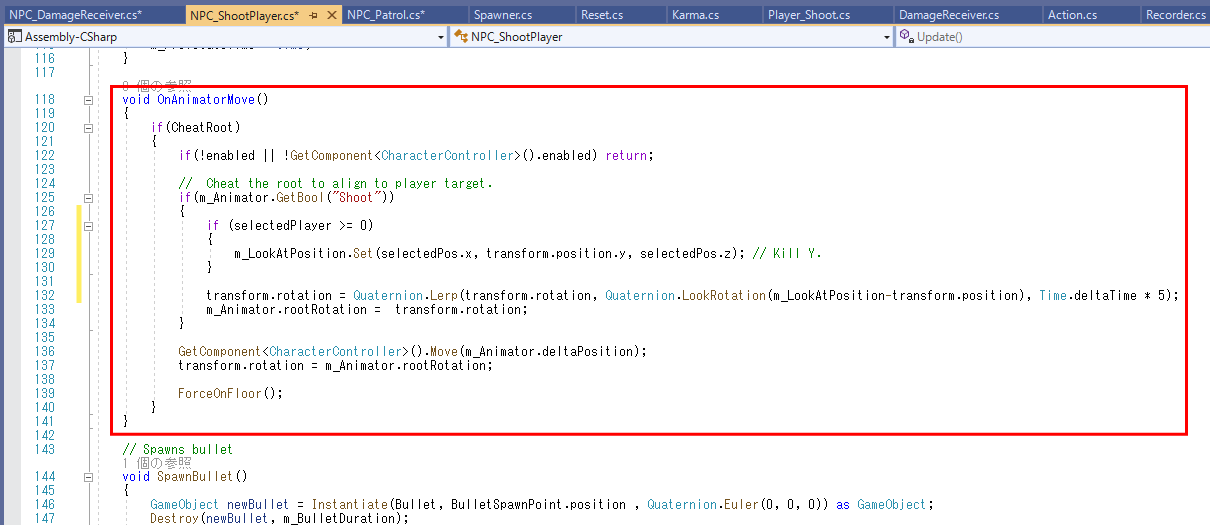
	void OnAnimatorMove()
	{
		if(CheatRoot)
		{
			if(!enabled || !GetComponent<CharacterController>().enabled) return;

			//  Cheat the root to align to player target.
			if(m_Animator.GetBool("Shoot"))
			{
                if (selectedPlayer >= 0)
                {
                    m_LookAtPosition.Set(selectedPos.x, transform.position.y, selectedPos.z); // Kill Y.
                }

                transform.rotation = Quaternion.Lerp(transform.rotation, Quaternion.LookRotation(m_LookAtPosition-transform.position), Time.deltaTime * 5);
				m_Animator.rootRotation =  transform.rotation;
			}

			GetComponent<CharacterController>().Move(m_Animator.deltaPosition);
			transform.rotation = m_Animator.rootRotation;

			ForceOnFloor();
		}
	}
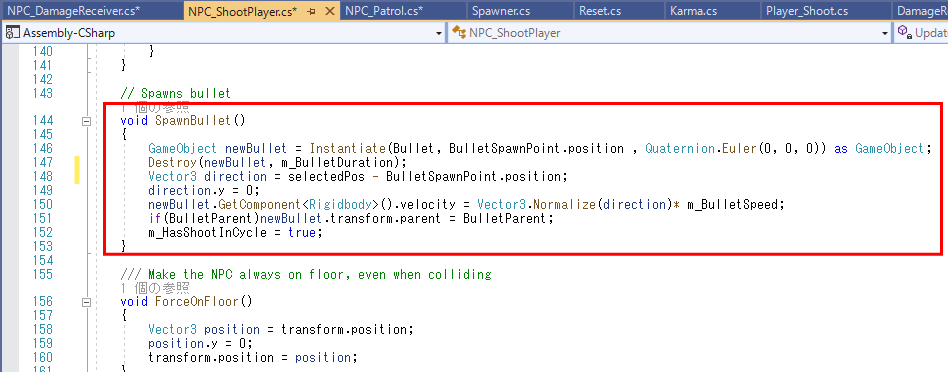
	void SpawnBullet()
	{
		GameObject newBullet = Instantiate(Bullet, BulletSpawnPoint.position , Quaternion.Euler(0, 0, 0)) as GameObject;
		Destroy(newBullet, m_BulletDuration);
        Vector3 direction = selectedPos - BulletSpawnPoint.position;
		direction.y = 0;
		newBullet.GetComponent<Rigidbody>().velocity = Vector3.Normalize(direction)* m_BulletSpeed;
		if(BulletParent)newBullet.transform.parent = BulletParent;
		m_HasShootInCycle = true;
	}
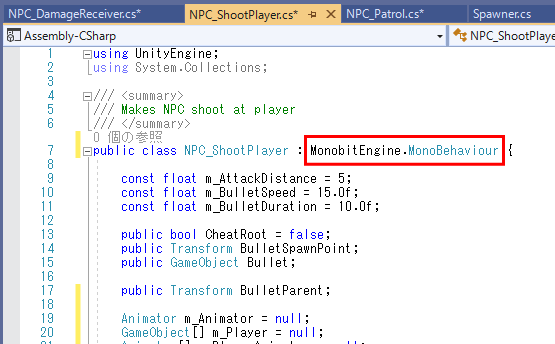
public class NPC_ShootPlayer : MonobitEngine.MonoBehaviour {
RPCメッセージを受信するためには、最低限 MonobitEngine.MonoBehaviour を継承している必要があります。
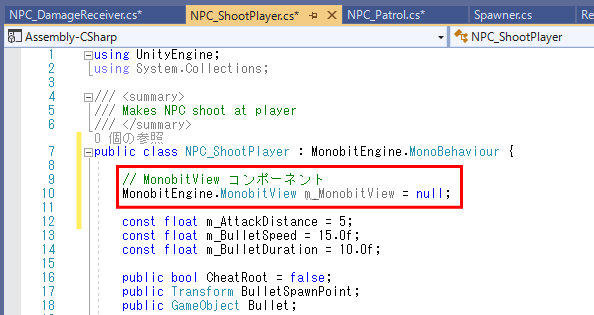
    // MonobitView コンポーネント
    MonobitEngine.MonobitView m_MonobitView = null;
前述までと同様、MonobitView コンポーネント本体の参照のための変数を用意します。
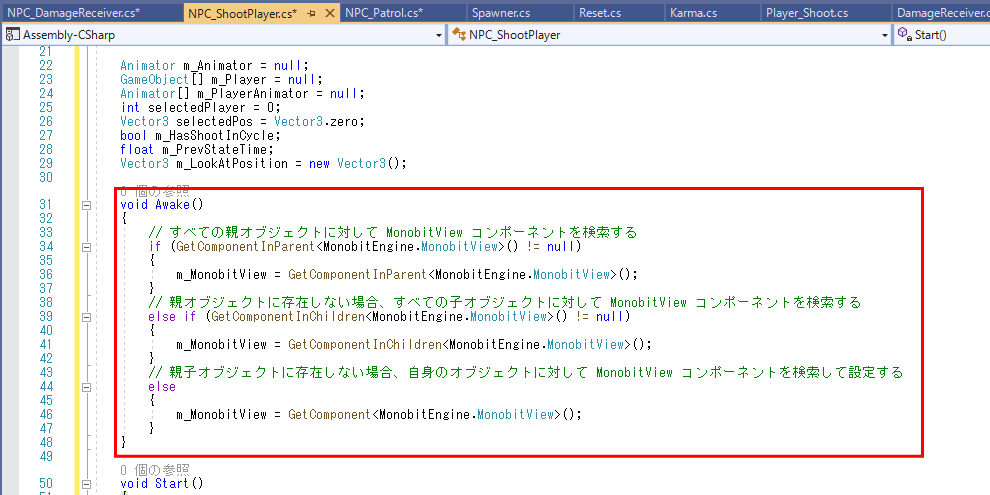
    void Awake()
    {
        // すべての親オブジェクトに対して MonobitView コンポーネントを検索する
        if (GetComponentInParent<MonobitEngine.MonobitView>() != null)
        {
            m_MonobitView = GetComponentInParent<MonobitEngine.MonobitView>();
        }
        // 親オブジェクトに存在しない場合、すべての子オブジェクトに対して MonobitView コンポーネントを検索する
        else if (GetComponentInChildren<MonobitEngine.MonobitView>() != null)
        {
            m_MonobitView = GetComponentInChildren<MonobitEngine.MonobitView>();
        }
        // 親子オブジェクトに存在しない場合、自身のオブジェクトに対して MonobitView コンポーネントを検索して設定する
        else
        {
            m_MonobitView = GetComponent<MonobitEngine.MonobitView>();
        }
    }
ここも前述までにも説明した通り、親オブジェクトに存在する MonobitView を検索し、
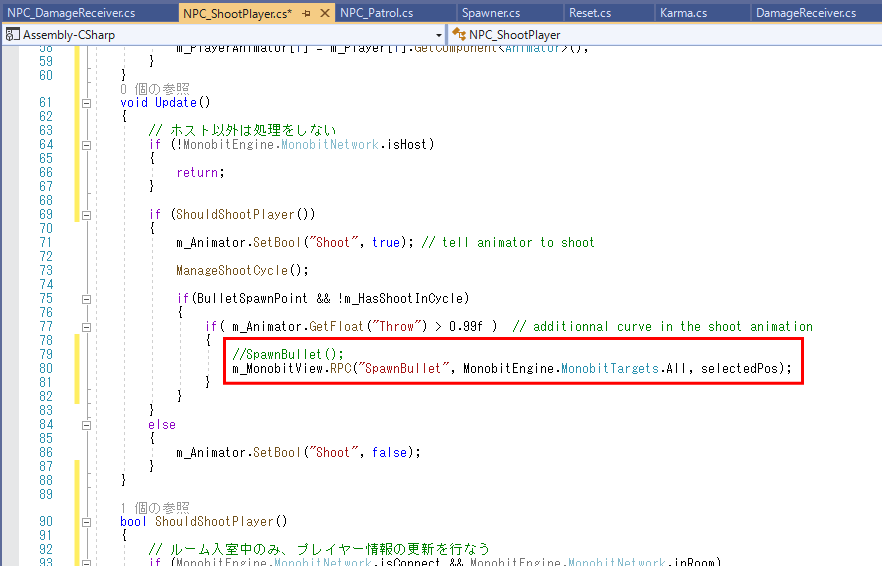
                     //SpawnBullet();
                    m_MonobitView.RPC("SpawnBullet", MonobitEngine.MonobitTargets.All, selectedPos);
弾を投げる瞬間に、SpawnBullet() の実行を「ルーム内のプレイヤー全員」に対して実行するようにします。
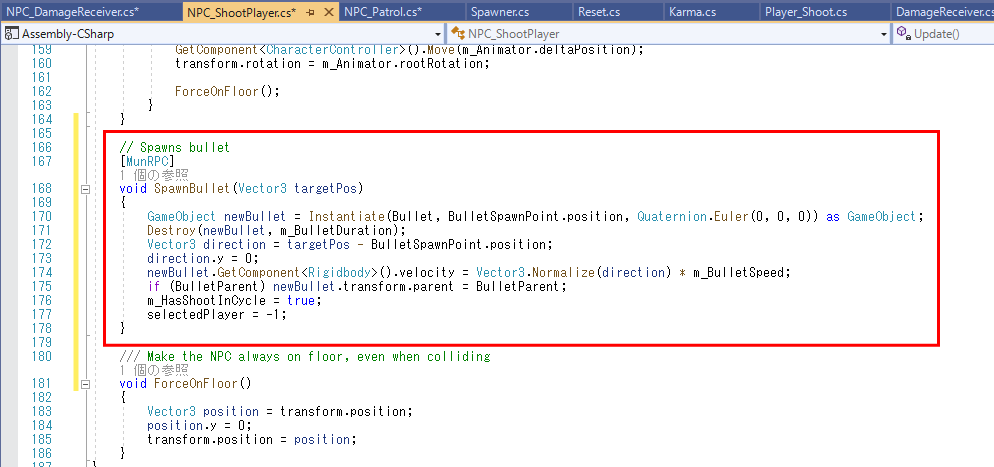
    // Spawns bullet
    [MunRPC]
    void SpawnBullet(Vector3 targetPos)
    {
        GameObject newBullet = Instantiate(Bullet, BulletSpawnPoint.position, Quaternion.Euler(0, 0, 0)) as GameObject;
        Destroy(newBullet, m_BulletDuration);
        Vector3 direction = targetPos - BulletSpawnPoint.position;
        direction.y = 0;
        newBullet.GetComponent<Rigidbody>().velocity = Vector3.Normalize(direction) * m_BulletSpeed;
        if (BulletParent) newBullet.transform.parent = BulletParent;
        m_HasShootInCycle = true;
        selectedPlayer = -1;
    }
MonobitView.RPC() メソッドを使ったRPCメッセージの送信に対し、弾を投げる処理 SpawnBullet の「受信関数化」を行います。
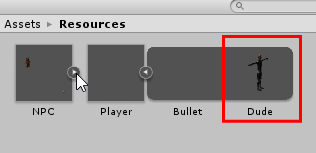
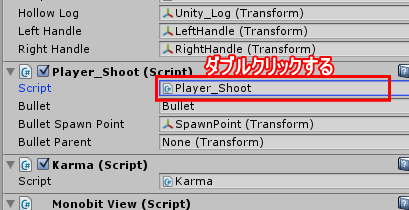
Assets/Resources フォルダを開き、 Player.prefab の右端にある「>」のマークをクリックします。
すると、player.prefab の中身が展開されます。
展開されたデータのうち、「Dude」と書かれたオブジェクトを選択します。
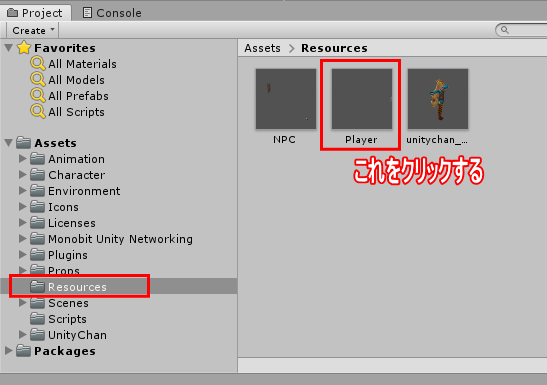
まず Assets/Resources フォルダーをクリックして選択し、その中にある Player.prefab を選択します。
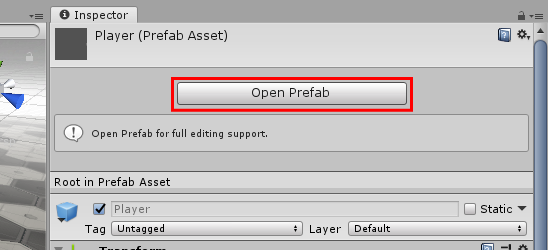
Player の Inspector にある「Open Prefab」のボタンを押します。
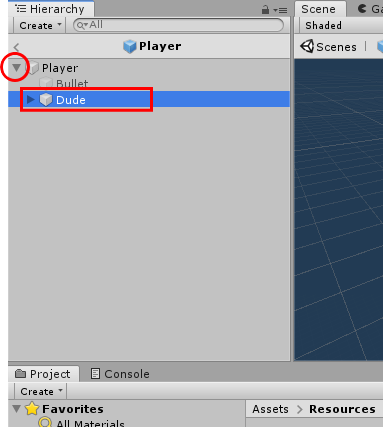
すると Hierarchy の表示箇所に Player.prefab がリスト化されて表示されますので、
親オブジェクト「Player」の左隣にある三角マークをクリックし、子オブジェクトの「Dude」を選択します。
public class NPC_ShootPlayer : MonobitEngine.MonoBehaviour {
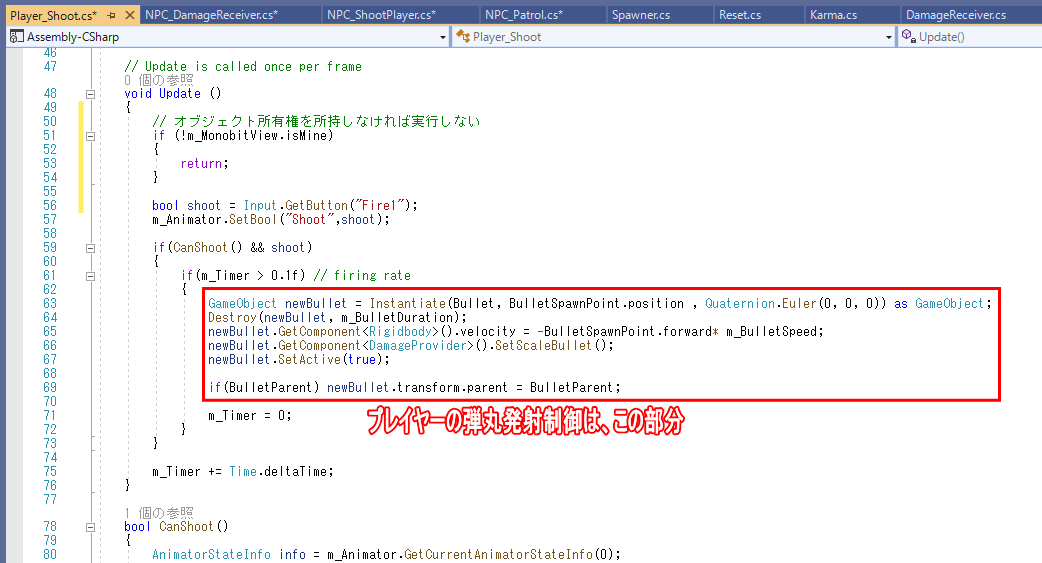
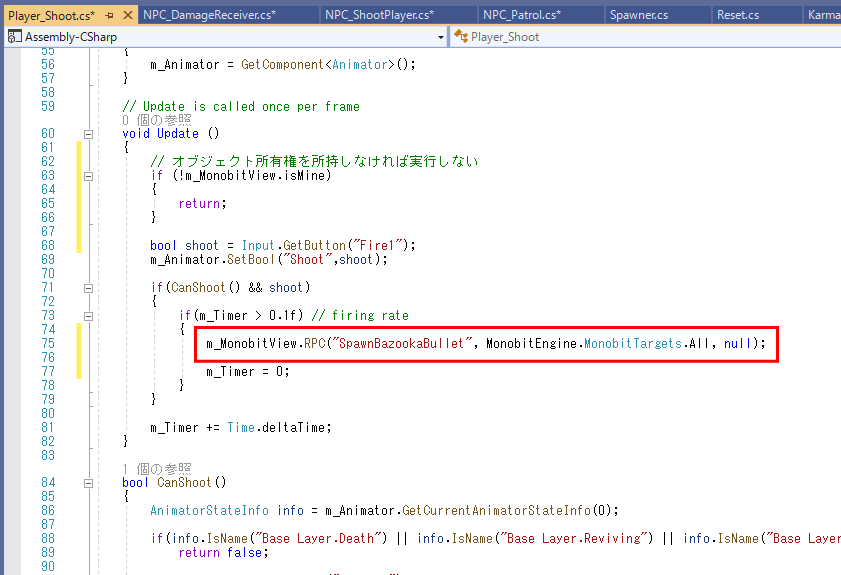
このコードと同じ処理を、「RPC 受信関数」としてまとめます。
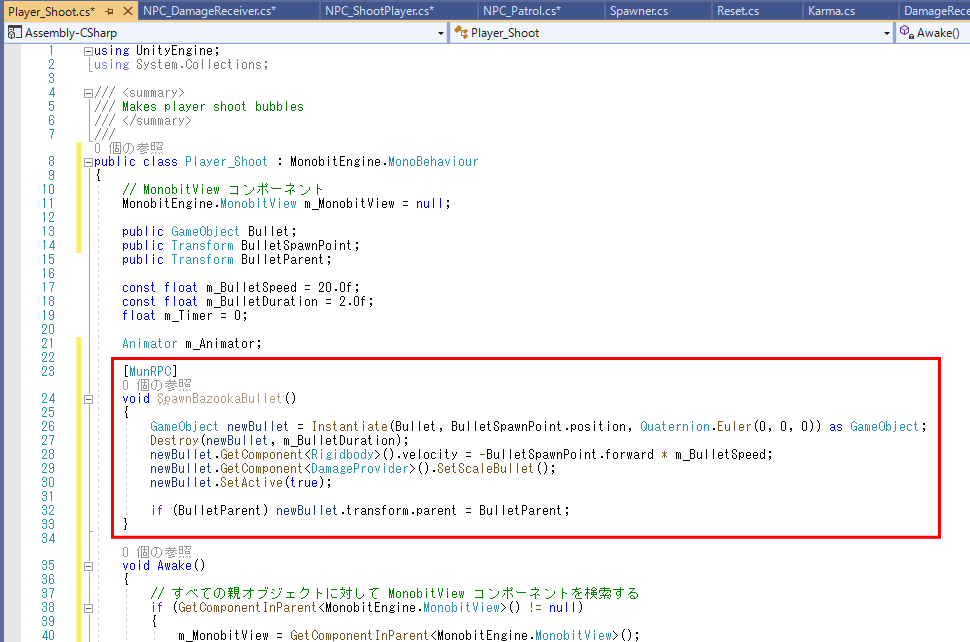
	[MunRPC]
	void SpawnBazookaBullet()
	{
		GameObject newBullet = Instantiate(Bullet, BulletSpawnPoint.position, Quaternion.Euler(0, 0, 0)) as GameObject;
		Destroy(newBullet, m_BulletDuration);
		newBullet.GetComponent<Rigidbody>().velocity = -BulletSpawnPoint.forward * m_BulletSpeed;
		newBullet.GetComponent<DamageProvider>().SetScaleBullet();
		newBullet.SetActive(true);

		if (BulletParent) newBullet.transform.parent = BulletParent;
	}
m_MonobitView.RPC("SpawnBazookaBullet", MonobitEngine.MonobitTargets.All, null);
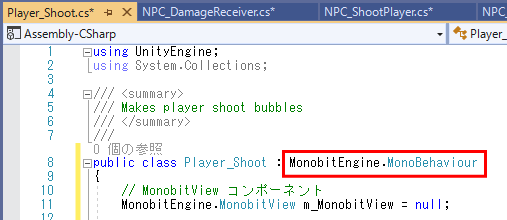
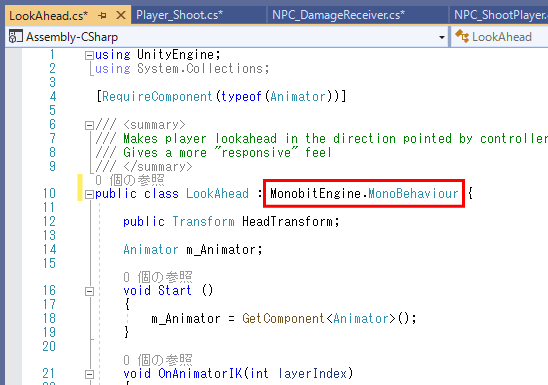
public class LookAhead : MonobitEngine.MonoBehaviour {何度も繰り返しになりますが、RPCメッセージを受信するためには、最低限 MonobitEngine.MonoBehaviour を継承している必要があります。
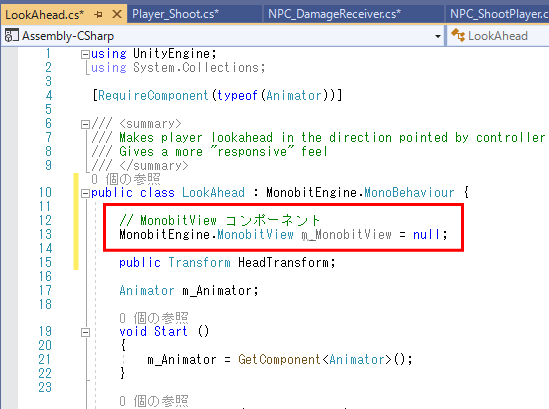
    // MonobitView コンポーネント
    MonobitEngine.MonobitView m_MonobitView = null;
前述までと同様、MonobitView コンポーネント本体の参照のための変数を用意します。
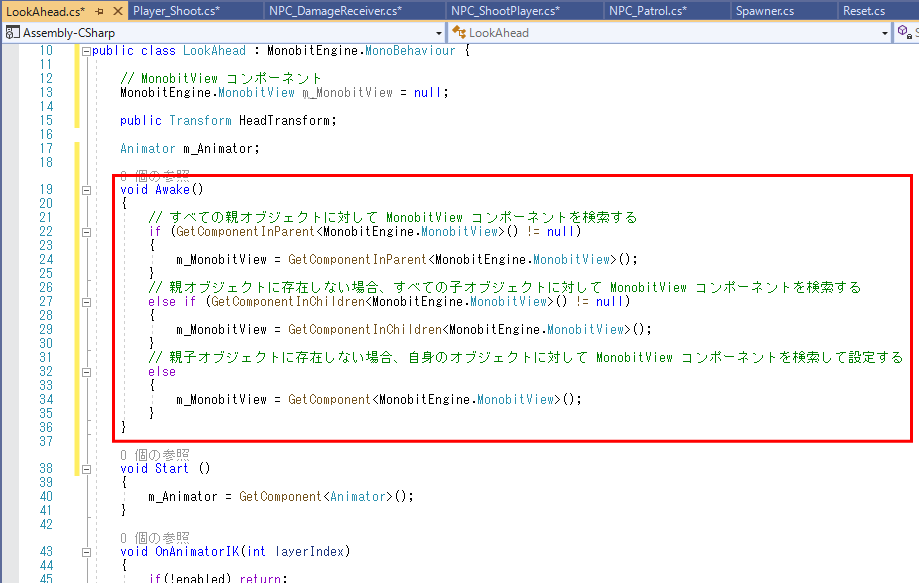
    void Awake()
    {
        // すべての親オブジェクトに対して MonobitView コンポーネントを検索する
        if (GetComponentInParent<MonobitEngine.MonobitView>() != null)
        {
            m_MonobitView = GetComponentInParent<MonobitEngine.MonobitView>();
        }
        // 親オブジェクトに存在しない場合、すべての子オブジェクトに対して MonobitView コンポーネントを検索する
        else if (GetComponentInChildren<MonobitEngine.MonobitView>() != null)
        {
            m_MonobitView = GetComponentInChildren<MonobitEngine.MonobitView>();
        }
        // 親子オブジェクトに存在しない場合、自身のオブジェクトに対して MonobitView コンポーネントを検索して設定する
        else
        {
            m_MonobitView = GetComponent<MonobitEngine.MonobitView>();
        }
    }
ここも前述までにも説明した通り、親オブジェクトに存在する MonobitView を検索し、
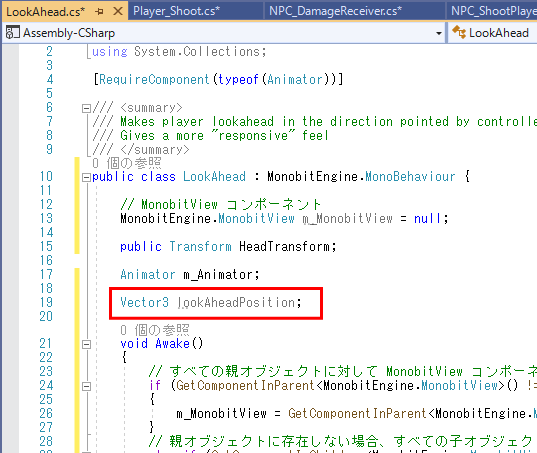
Vector3 lookAheadPosition;
弾の発射方向を設定する変数 lookAheadPosition を用意します。
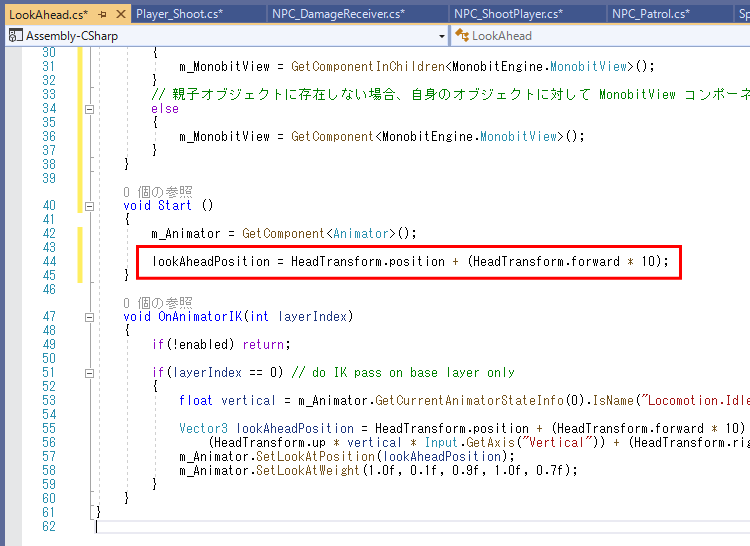
lookAheadPosition = HeadTransform.position + (HeadTransform.forward * 10);
Inspectorで登録された HeadTransform(プレイヤーキャラクタの頭のスケルトン)の位置・方向に合わせて初期値を設定します。
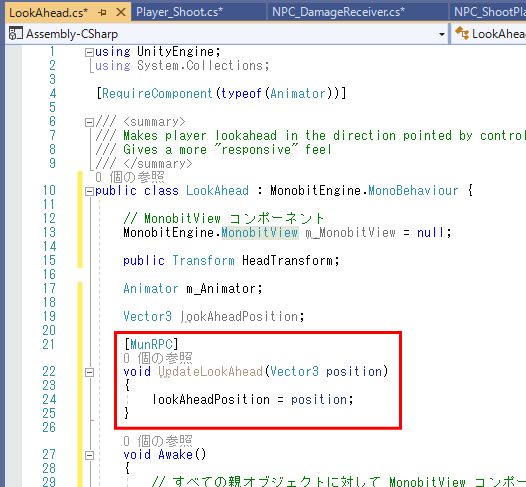
    [MunRPC]
    void UpdateLookAhead(Vector3 position)
    {
        lookAheadPosition = position;
    }
	void OnAnimatorIK(int layerIndex)
	{
		if(!enabled) return;

		if(layerIndex == 0) // do IK pass on base layer only
		{
            if (m_MonobitView.isMine)
            {
                float vertical = m_Animator.GetCurrentAnimatorStateInfo(0).IsName("Locomotion.Idle") ? 10 : 0;

                Vector3 lookAheadPosition = HeadTransform.position + (HeadTransform.forward * 10) +
                    (HeadTransform.up * vertical * Input.GetAxis("Vertical")) + (HeadTransform.right * 20 * Input.GetAxis("Horizontal"));
                m_Animator.SetLookAtPosition(lookAheadPosition);
                m_Animator.SetLookAtWeight(1.0f, 0.1f, 0.9f, 1.0f, 0.7f);
                m_MonobitView.RPC("UpdateLookAhead", MonobitEngine.MonobitTargets.All, lookAheadPosition);
            }
            else
            {
                m_Animator.SetLookAtPosition(lookAheadPosition);
                m_Animator.SetLookAtWeight(1.0f, 0.1f, 0.9f, 1.0f, 0.7f);
            }
        }
	}
ここでは、プレイヤー自身の操作( MonobitView.isMine == true )の場合、既存の lookAheadPosition を使った頭位置(弾の発射方向)を変更し、